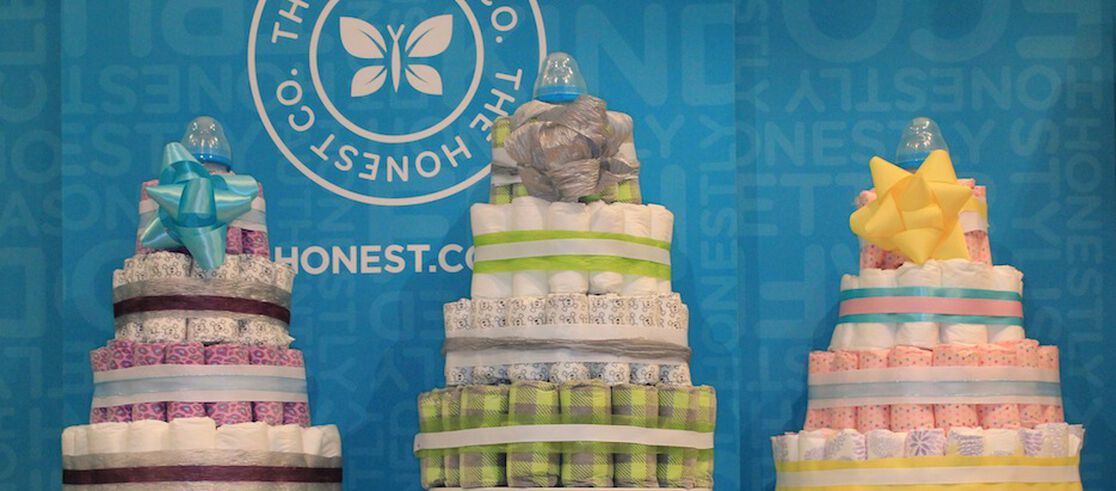
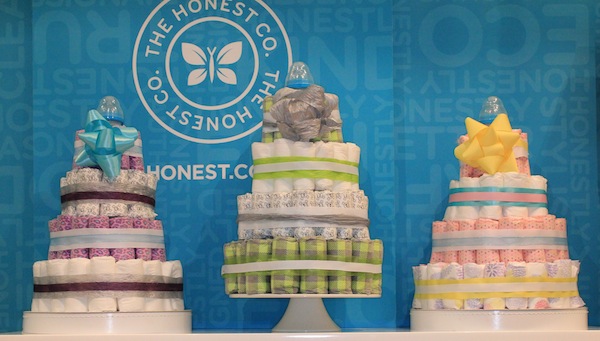
At your next baby shower, surprise a mom-to-be and her guests with a diaper cake. They’re as sweet as the real thing (just without the calories) because they can be decorated to reflect the shower’s theme or match the baby’s nursery, adding a personal touch to the party. And your friend will really appreciate your creativity in preparing the special décor—she can take it home and actually use it once the baby arrives. Who doesn’t love a DIY that is both pretty and practical?
If crafting isn’t your thing or time is of the essence, check out our super cute (and custom made) diaper cakes! It comes in four different prints and a mini diaper cake size, too! Pick the print that matches the shower theme, we’ll wrap it and tie it with a bow, and then ship it to your door!
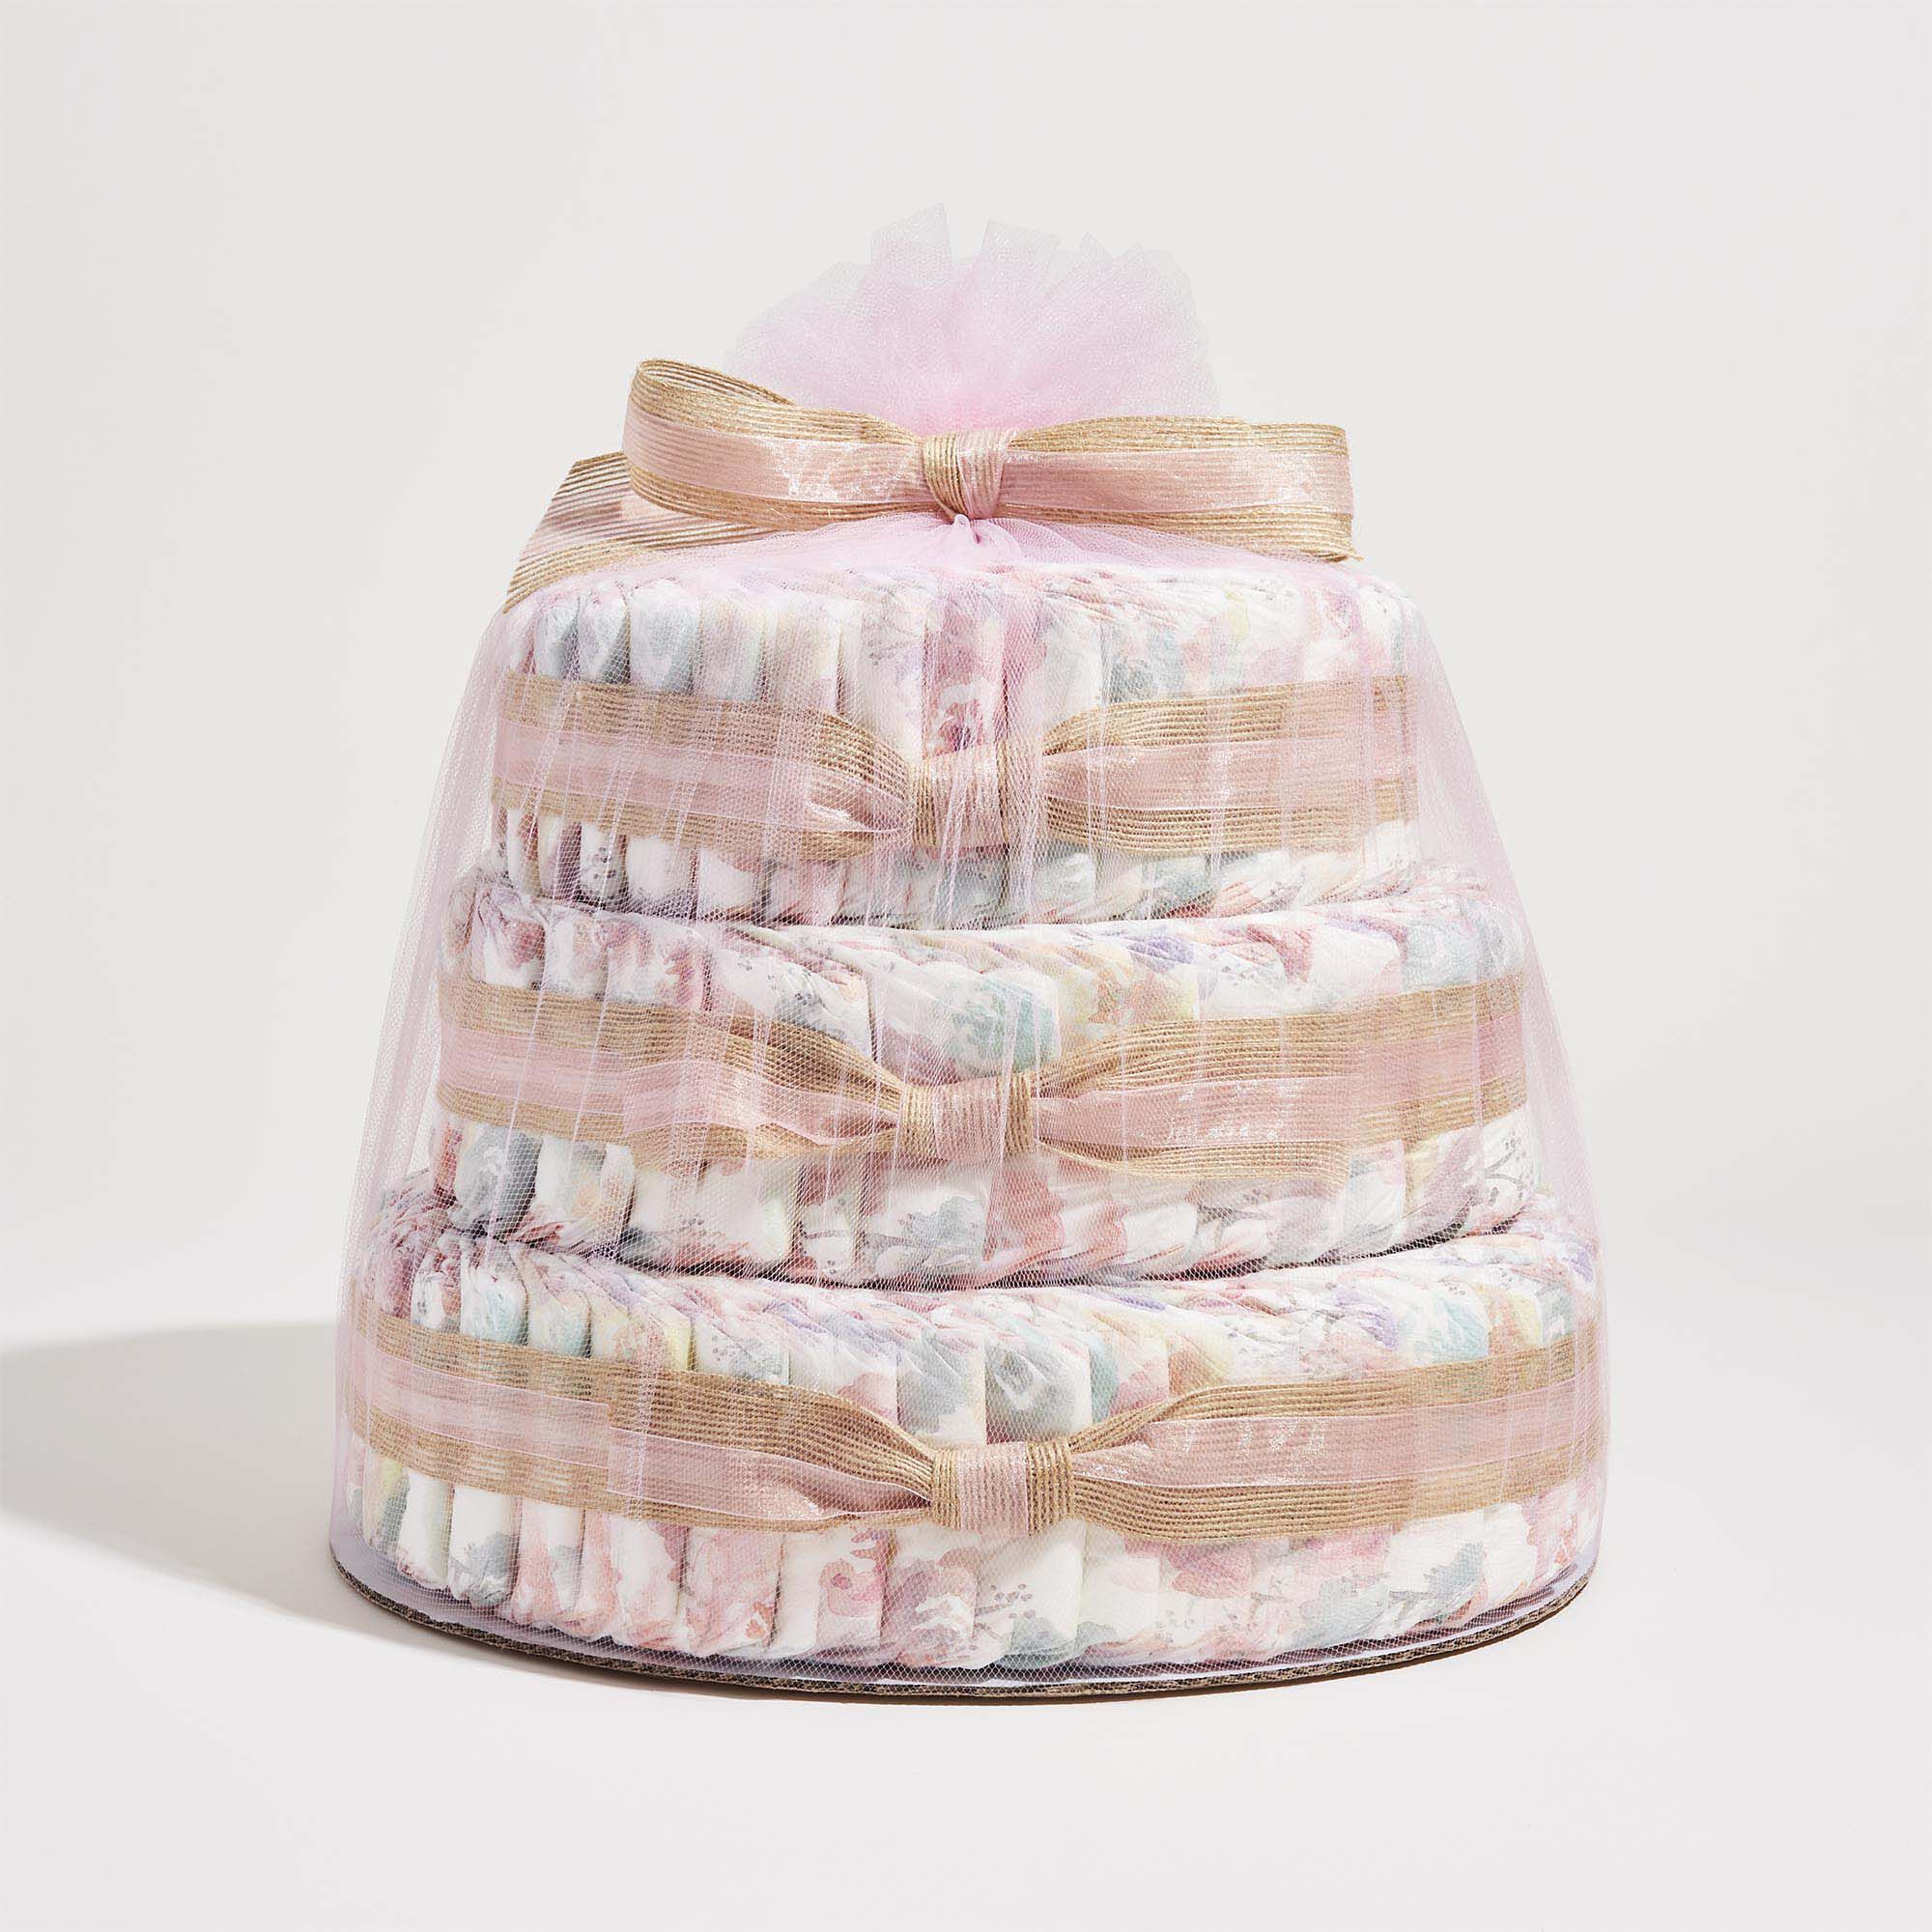
Making a Diaper Cake
Materials
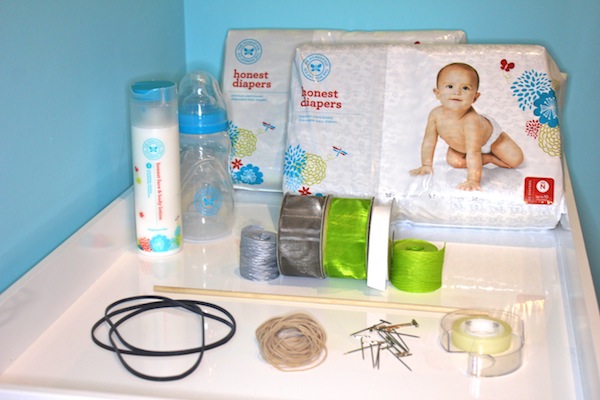
- 2 bags of Honest newborn diapers (pattern of your choice), for 80 diapers total. The number of diapers needed for the cake depends on the size and number of tiers you plan to make. This diaper cake has four medium-sized tiers.
- Honest Face & Body Lotion or a wooden dowel.
- 120 thin rubber bands.
- 4 XXL rubber bands.
- Double-sided tape.
- T-pins.
- Assortment of ribbon in colors that complement the diaper pattern you selected. We used a 3-inch wide “thick” ribbon and a 1-inch wide “thin” ribbon.
- Cake plate, paper plate, or piece of cardboard for the base.
- Cake decorations or baby accessories (optional).
DIY Directions
Roll the Diapers
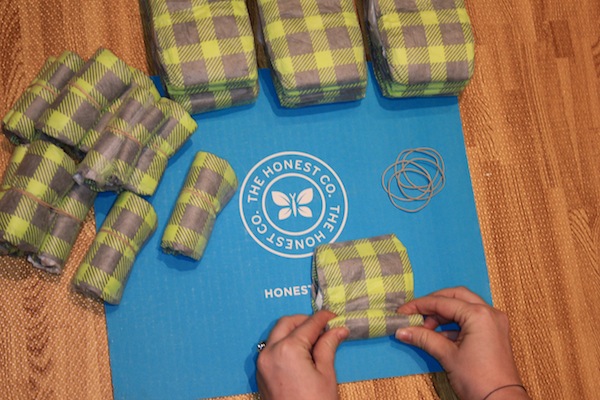
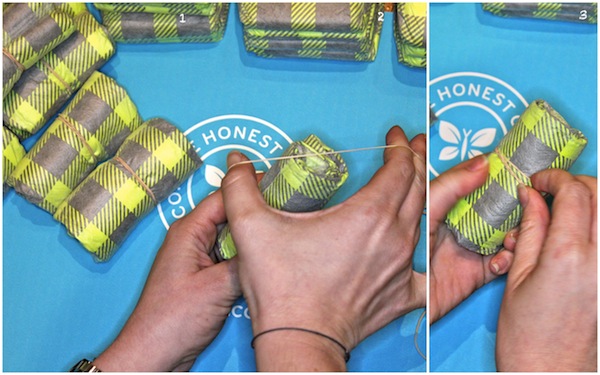
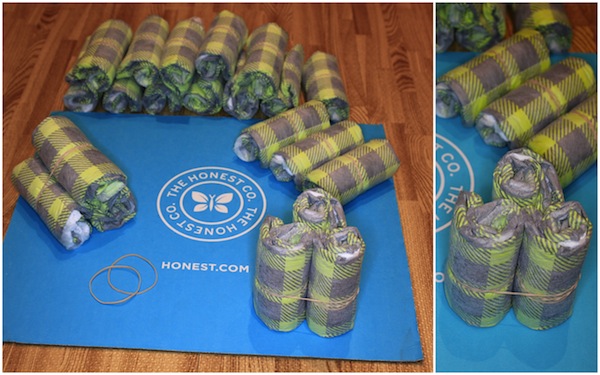
1. Starting from the top of the diaper (the waist), neatly roll the diaper. To keep the diaper tightly rolled, wrap a thin rubber band around the center. Repeat this step until all of your diapers are rolled.
2. Gather three of your rolled diapers and place a thin rubber band around the group so they are bound together. Repeat this step creating 20 rolled diaper trios.
Creating the Tiers
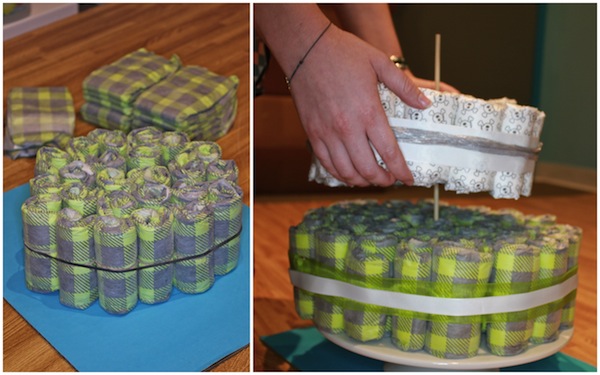
1. Gather three of your diaper trios and place them at the center of your cake plate (or whatever you are using for your base). Hold the diaper trios upright and place an extra large rubber band around the group to keep them together. Continue adding diaper trios to your base by stretching the rubber band to expand around the additional diaper trios. Do this until you reach the desired width of your base tier. To help round out the shape of your base add single rolled diapers in the appropriate places.
2. For the remaining tiers of your diaper cake simply repeat this step but remember to make each layer smaller then the next.
3. Place the dowel into the center of your base tier. Then carefully slide each of your tiers down so that the dowel runs through the center of your diaper cake. This will help keep the tiers in place. Or if you want to tuck additional surprise gifts inside, you can use essentials like our Honest face & body lotion to give the cake stability.
Decorating Your Diaper Cake
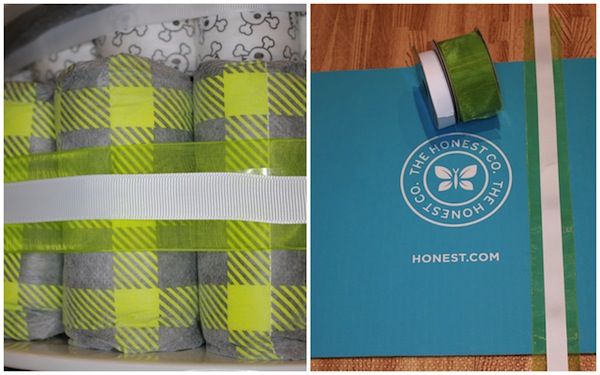
1. Using the thick ribbon, measure the circumference of each tier. Cut the thick and thinner ribbon the appropriate length for each tier.
2. Lay the ribbons on a flat surface and attach the thin ribbon down the center of the thick ribbon using the double-sided tape.
3. Wrap the ribbon around each tier so that it hides the rubber bands holding the cake together. Pull the ribbon tightly so that the two ends overlap slightly. Using T-pins adhere the ribbon to the diapers as discreetly as possible.
4. Put on the finishing Touches. Add a big bow to the top tier or a small toy or product, like an Honest baby bottle.
Have fun personalizing it for the mom-to-be and her baby shower—it’s a piece of cake! We'd love to see the cake you create…Comment below, post on our Facebook page, Instagram, or Tweet, a photo using #HonestDIY!
We aim to provide you with the most honest and credible information possible. This article was reviewed for accuracy by The Honest Team and its internal technical experts.
blog_review_statement