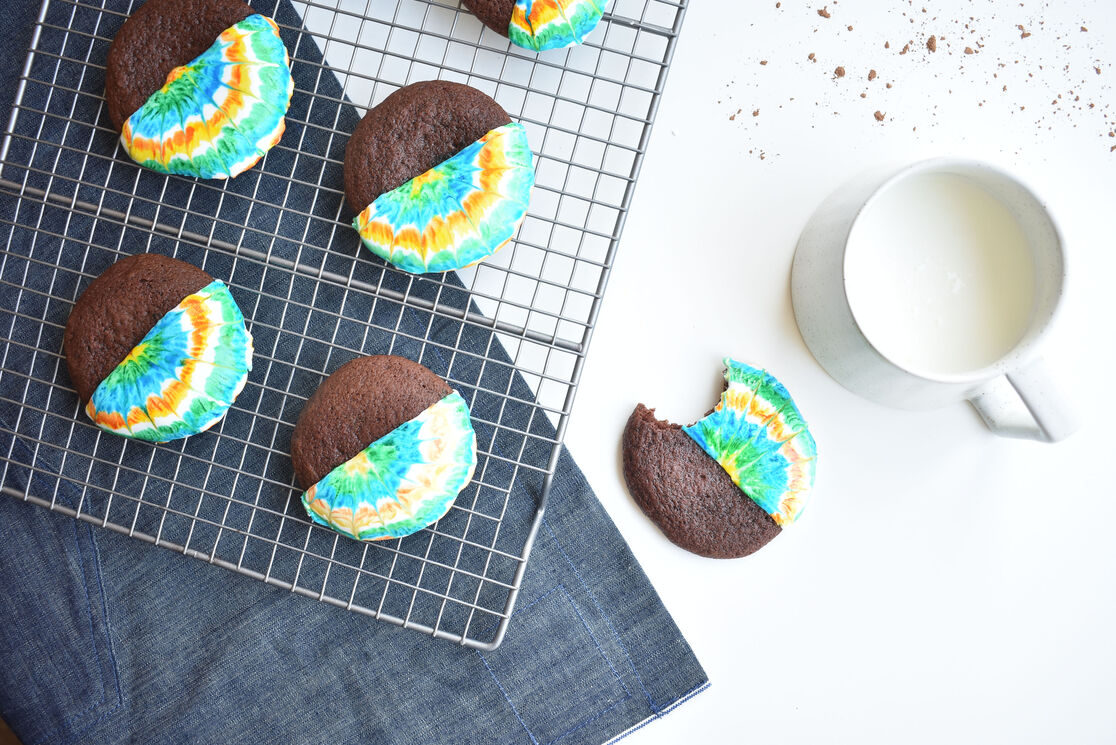
Ayesha Curry, Honest mama and our fave kid-friendly food expert, is famous for her "happy accident recipes." This time, in an attempt to make groovy tie dye cookies to celebrate our new Summer Diapers, she needed a cookie with a smooth enough surface to do the tie dye icing application.
Lucky for all of us, she stumbled on perhaps one of the most delicious creations ever, the “cupcookie.” It’s essentially the most delicious part of a cupcake (the top) with enough structure to be enjoyed like a cookie.
Can't wait for you to enjoy them! Tag us on Instagram @Honest. We'd love to see your creations.
Prep Time: 20 minutes
Cook Time: 10 minutes
Decoration Time: 15 minutes
Total Time: 45 minutes
Ingredients:
- 1 ½ c all-purpose flour
- 1 tsp baking soda
- ½ tsp baking powder
- 1 tsp salt
- 6 Tbsp cocoa powder
- ½ c dark brown sugar
- ½ c white granulated sugar
- 2 eggs
- 2 Tbsp buttermilk
- ½ c butter
- 1 tsp vanilla extract
“Groovy” Royal Icing:
- 3 Tbsp meringue powder
- 4 cups confectioners’ sugar
- 4 Tbsp warm water
- Food coloring (preferably with no artificial dyes!)
Directions
1. Preheat: Preheat your oven to 350 degrees, making sure you have a rack set up in the middle of the oven.
2. Mix the dry ingredients: In a medium bowl combine the flour, baking soda, baking powder, salt and cocoa powder. Mix well and set aside.
3. Mix the wet ingredients: Place the room temperature butter in a large bowl or a stand mixer. Mix in the sugar and brown sugar on low speed. Add the eggs one at a time, and then the buttermilk and vanilla. Stir until well combined.
4. Finish the dough: In small increments, fold in the dry mixture using a spatula. Stir until the ingredients are combined and a dough forms, but be careful not to overmix! If time allows, cover the bowl with plastic wrap and place in the refrigerator for up to one hour to chill.
5. Bake: Once you’re ready to bake, scoop out uniform balls and place on a cookie sheet covered with parchment. Bake for 9 minutes.
6. Make your royal icing: Using a mixer, beat all ingredients together until icing forms peaks (around 7-10 minutes).
7. Ice the cookies: Spoon your royal icing into a piping bag, or a plastic storage bag (whatever you have on hand!). Snip the end and place a cooled cookie on a flat, clean surface. Carefully draw a line down the center of the cookie, and then follow the edge to outline around half the perimeter. Continue to pipe around the outline until it’s all filled in. Don’t worry if the icing does not have a smooth surface, it may just need a minute to settle.
7. Time to decorate: You can find baking brushes and an array of colorful dyes at your local craft store. In small bowls, add a few drops of dye with a little water to dilute to your preferred hue. Using your brush, carefully dab each color in concentric circles. Next, take a clean toothpick and gently drag from the center out to the edge of the cookie to allow the colors to blend. Once you have your desired design, leave the cookies on a rack to dry. Once the royal icing has hardened, it’s time to enjoy!
We aim to provide you with the most honest and credible information possible. This article was reviewed for accuracy by The Honest Team and its internal technical experts.
blog_review_statement


